

Apps
Mainly used to set the UI of the APP, store page information, etc.
Step 1 -Create APP
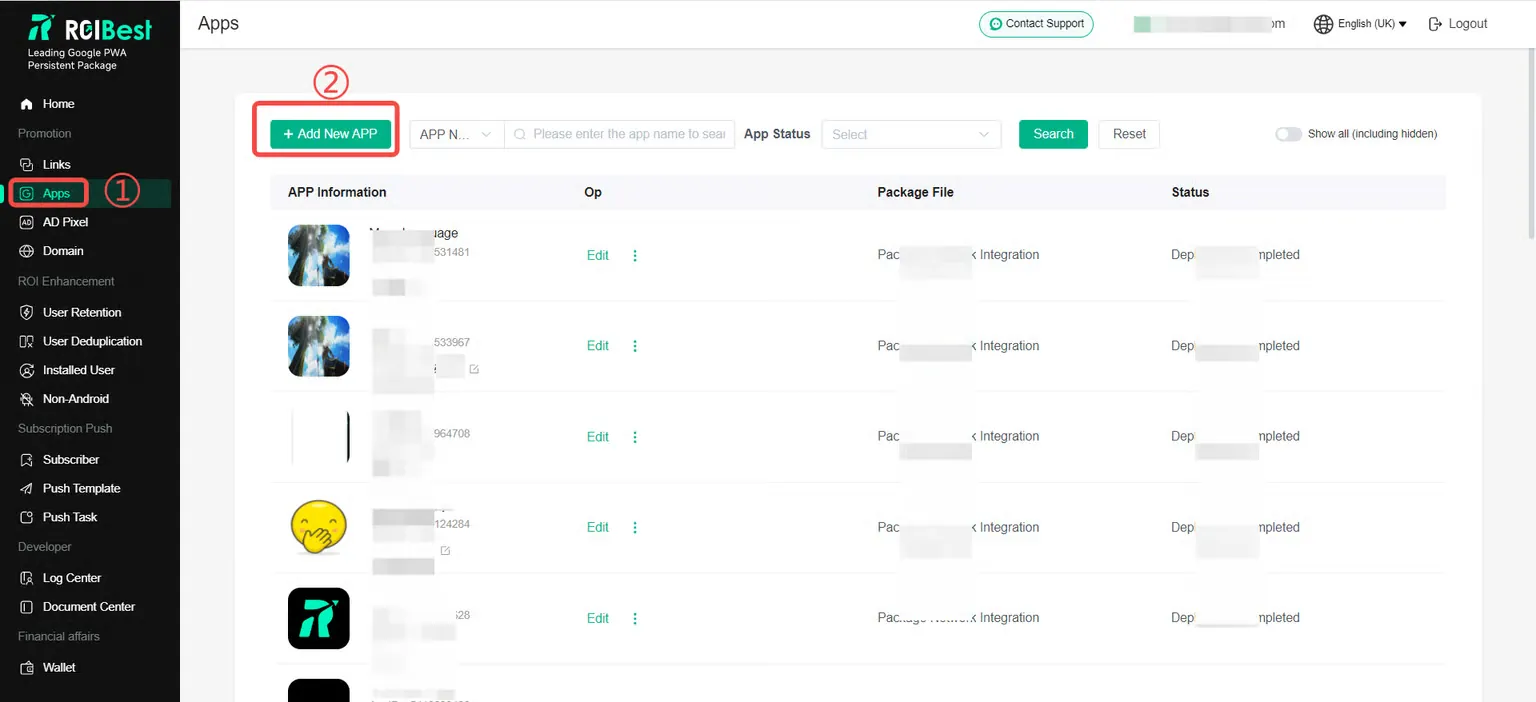
Click to enter the [APPS] page, and click [+Add New APP] to enter the APP information editing page;
Step 2 -Complete APP information
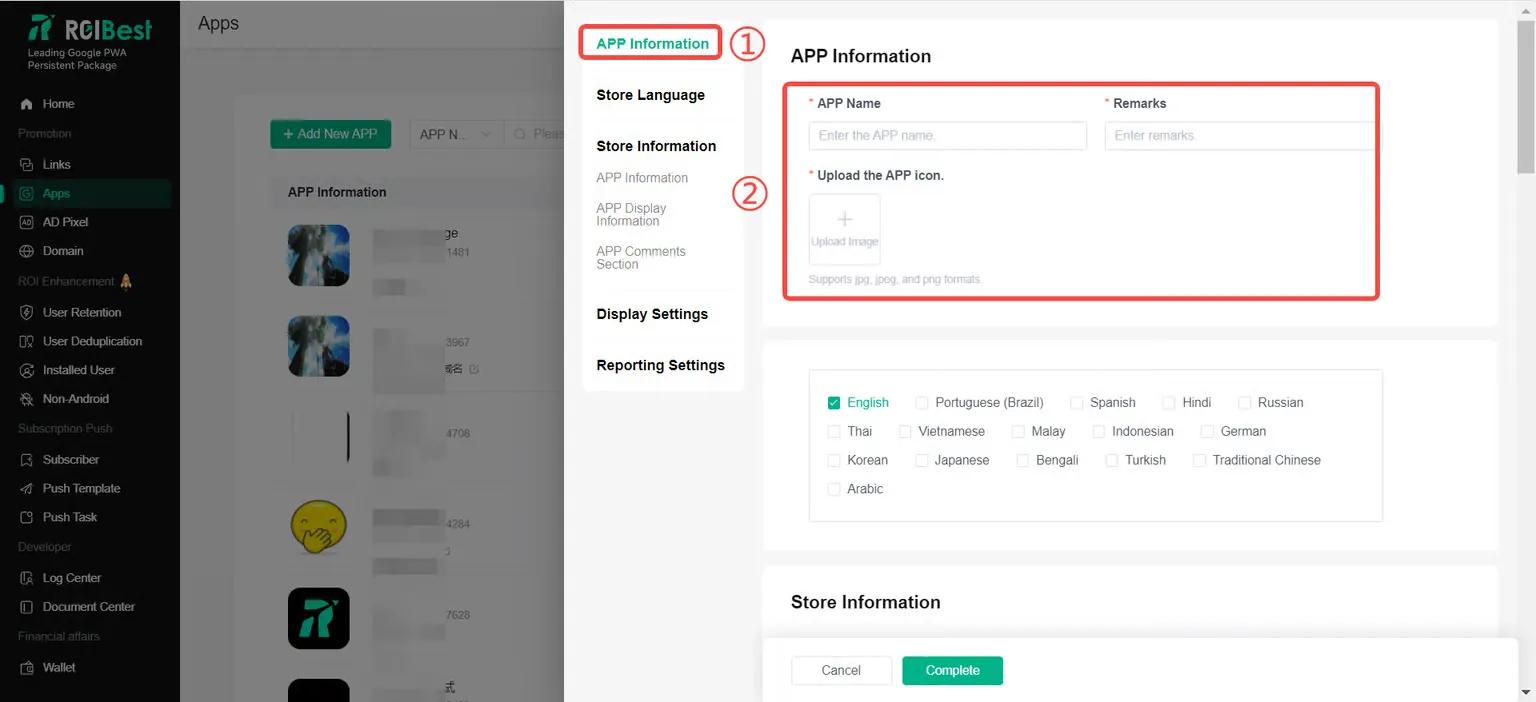
Select APP information and improve APP desktop icon and name settings
Notice:
The [APP name] and [Upload the APP icon] will be displayed on the desktop. Remarks are mainly used for internal notes to facilitate management and are not displayed externally. Please set according to the actual situation.
Step 3 -Complete store page language
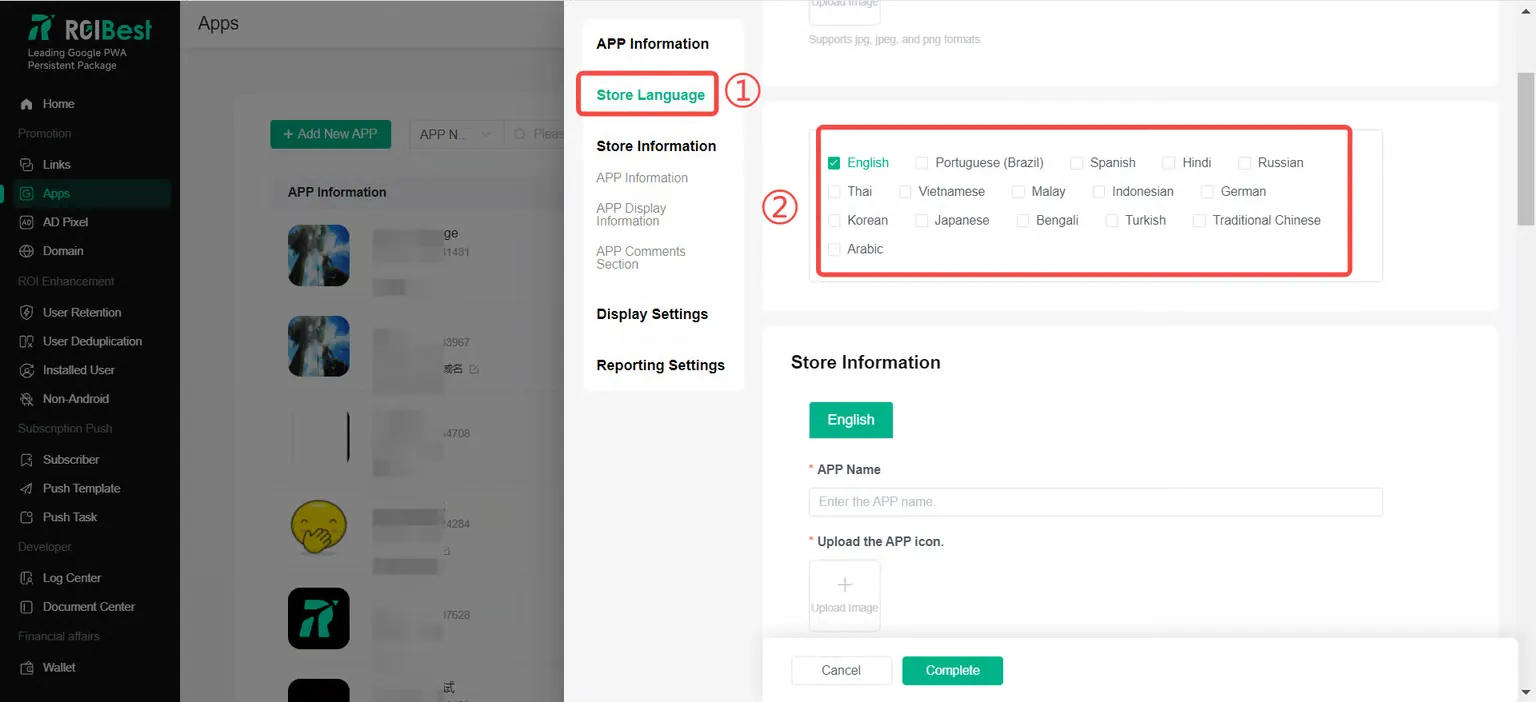
Click on the [store language] and select single or multiple languages according to the area where the APP is released.
Step 4 -Complete store information
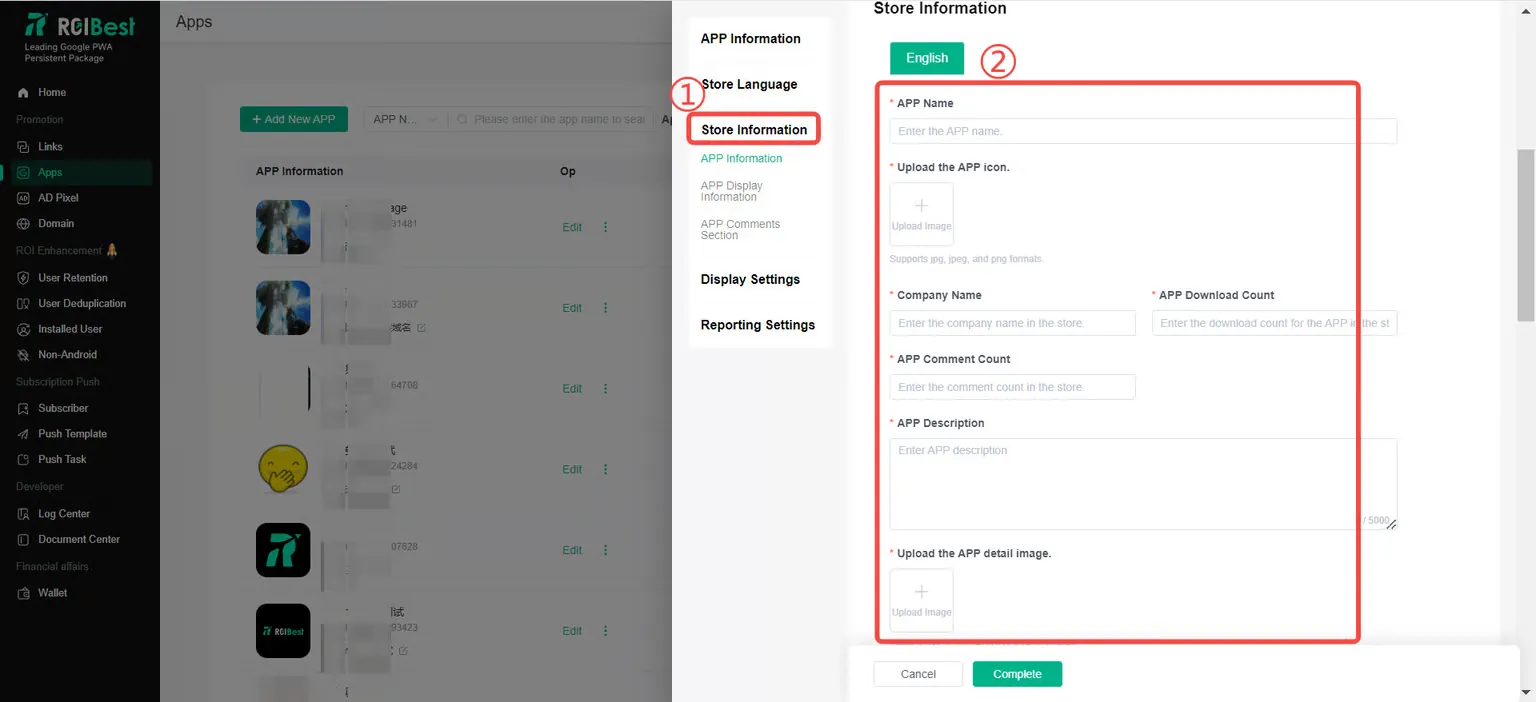
Select the store information and improve the corresponding content according to the APP situation
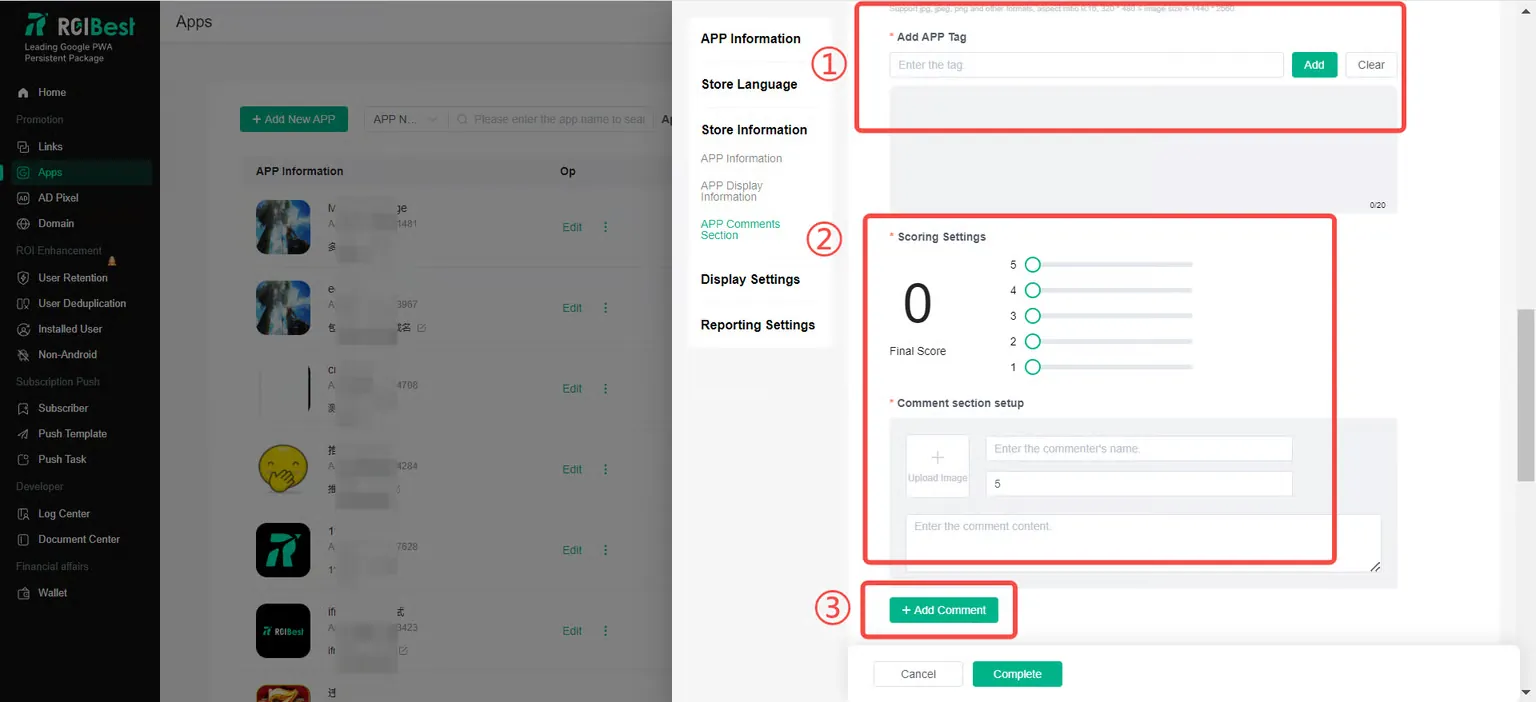
Notice:
①According to the content of the APP application, the APP Tag can be customized;
②It is recommended that the rating of the APP be 4.5 points and above, and the recommendation for setting comments can be 3 or above.
Step 5 -Complete Display Settings
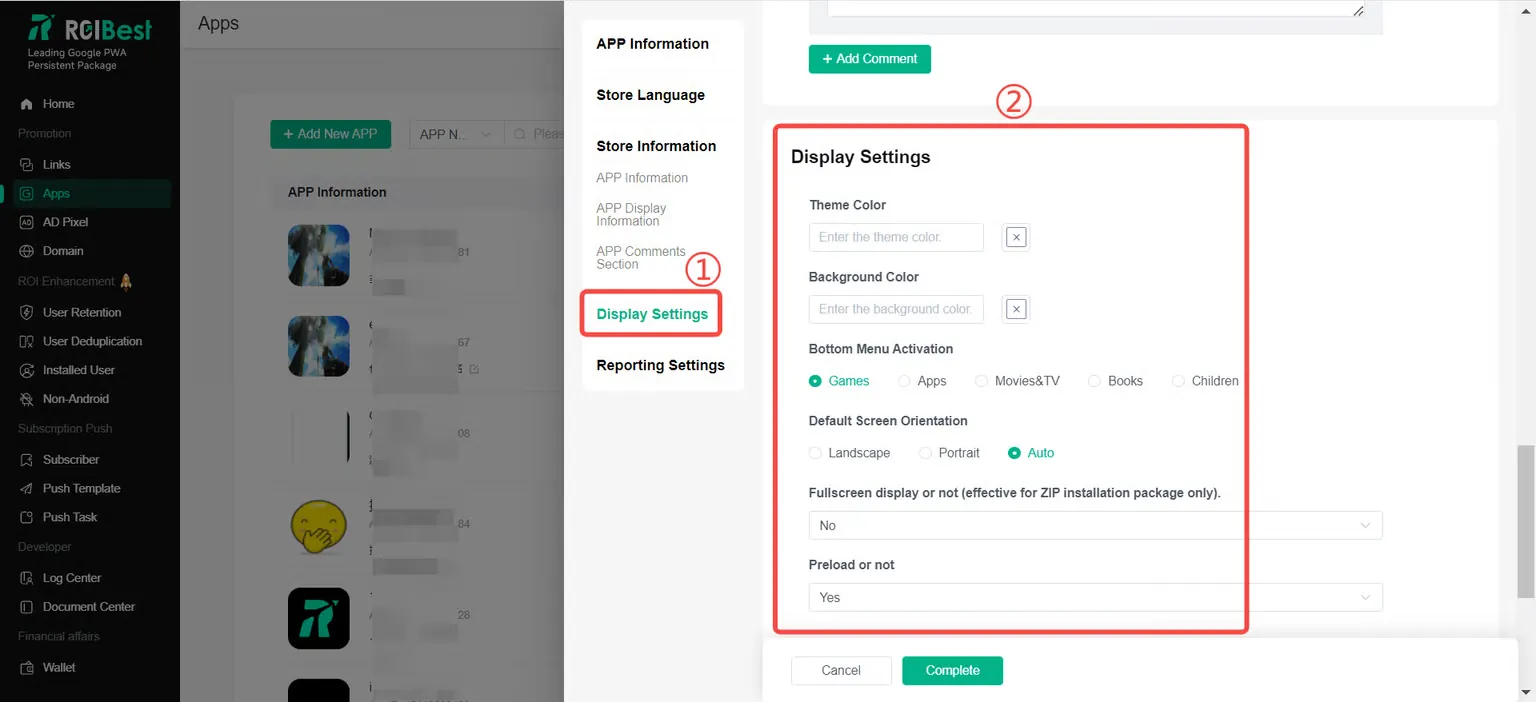
Note:
① The theme and background color can be color matched according to the application content, generally black and white is selected; the bottom menu can be selected according to the application content;
②The default screen orientation is horizontal or vertical screen or adaptive selection according to the application content. Full-screen display is currently only effective for self-research access. Turning on preloading can load application content in advance. It is recommended to turn it on;
Step 6 -Complete Reporting Settings
Select the corresponding reporting settings and click [complete] to complete the APP details settings;
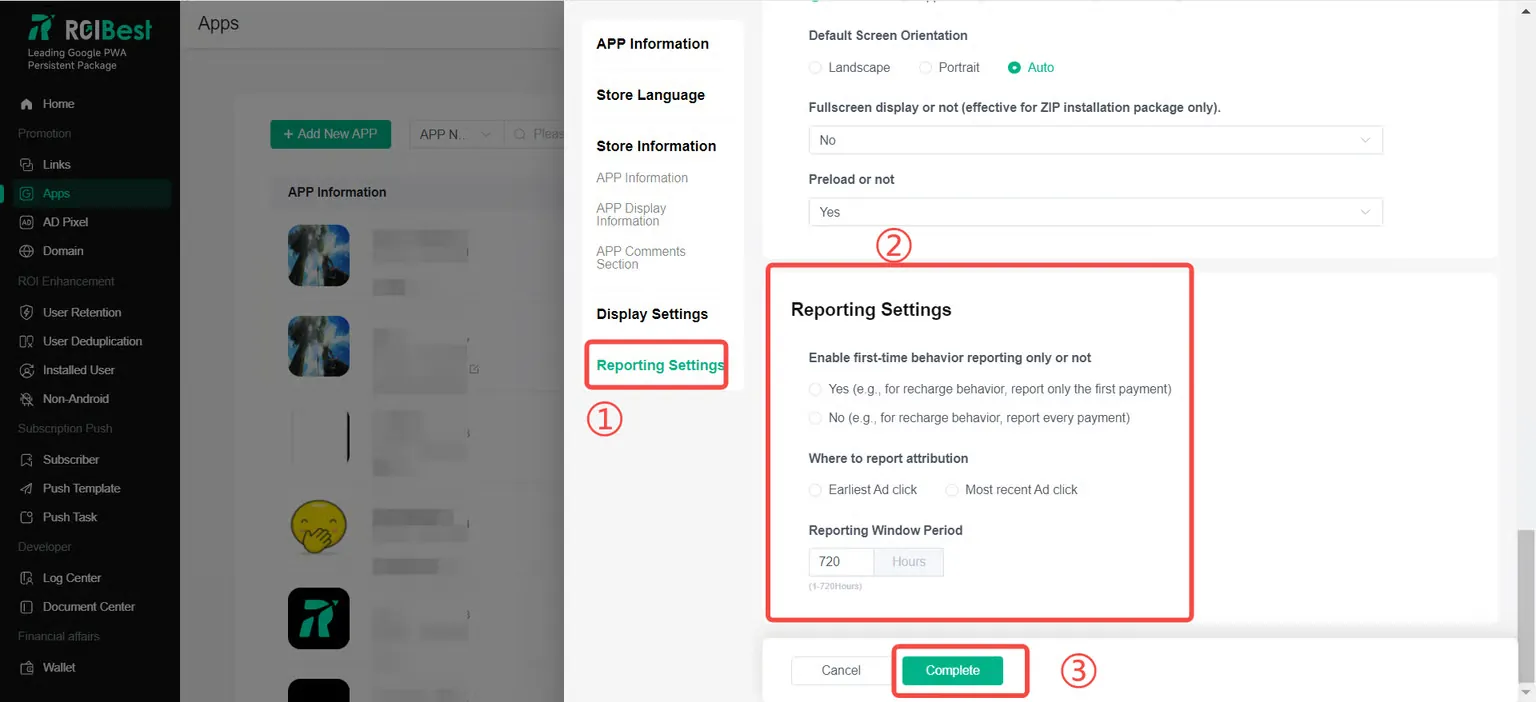
Note:
The reporting settings are mainly used for event postback of the advertising platform. You can set the event postback within the corresponding time after the customer clicks on the advertisement. If the timeout expires, no postback will be performed.