
Kwai FAQ
What are the conditions for launching Kwai?
①Kwai's advertising account and delivery link need to be added to the whitelist. For details, please consult the delivery media. If you need assistance, please consult the ROIBest PWA customer success manager.
②Do not use Kwai's built-in browser for testing. You need to set Chrome as the default.
Package Network Integration :Kwai How to get PixelCode/test feedback?
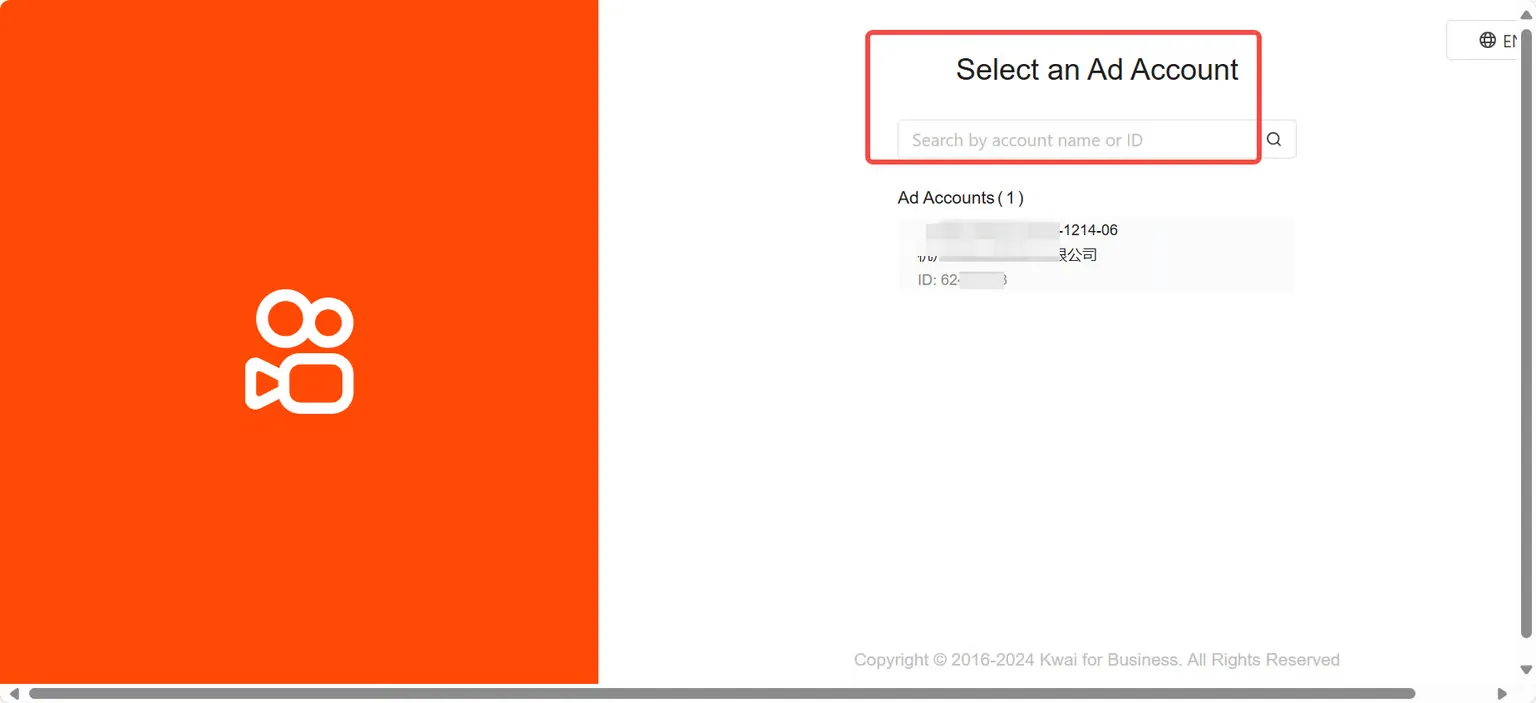
Step 1 - Log in to Kwai Ads
Kwai backend login URL: https://ads.kwai.com/#/ , please log in with your business promotion account;
Step 2 - Create and obtain PixelCode
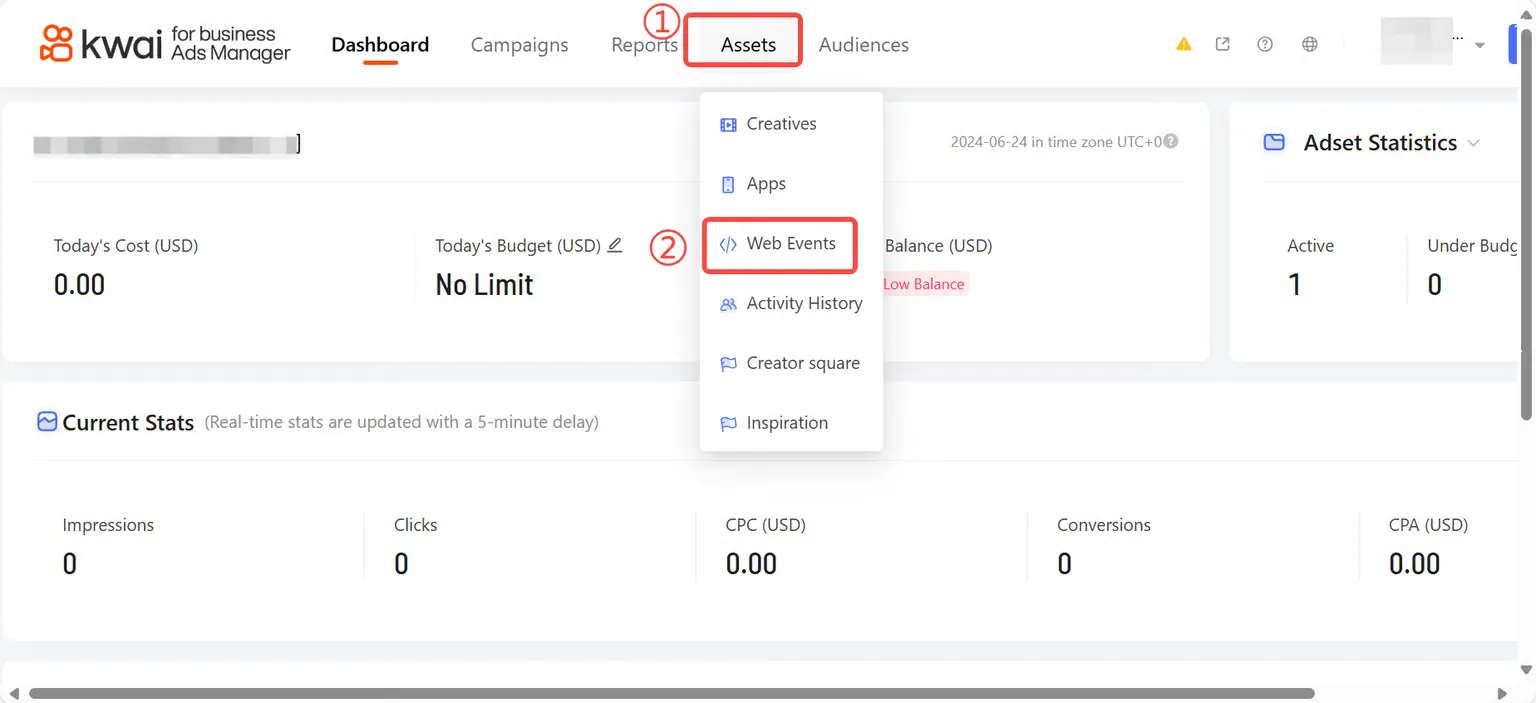
Select [Assets], click [Web Events] in the drop-down box
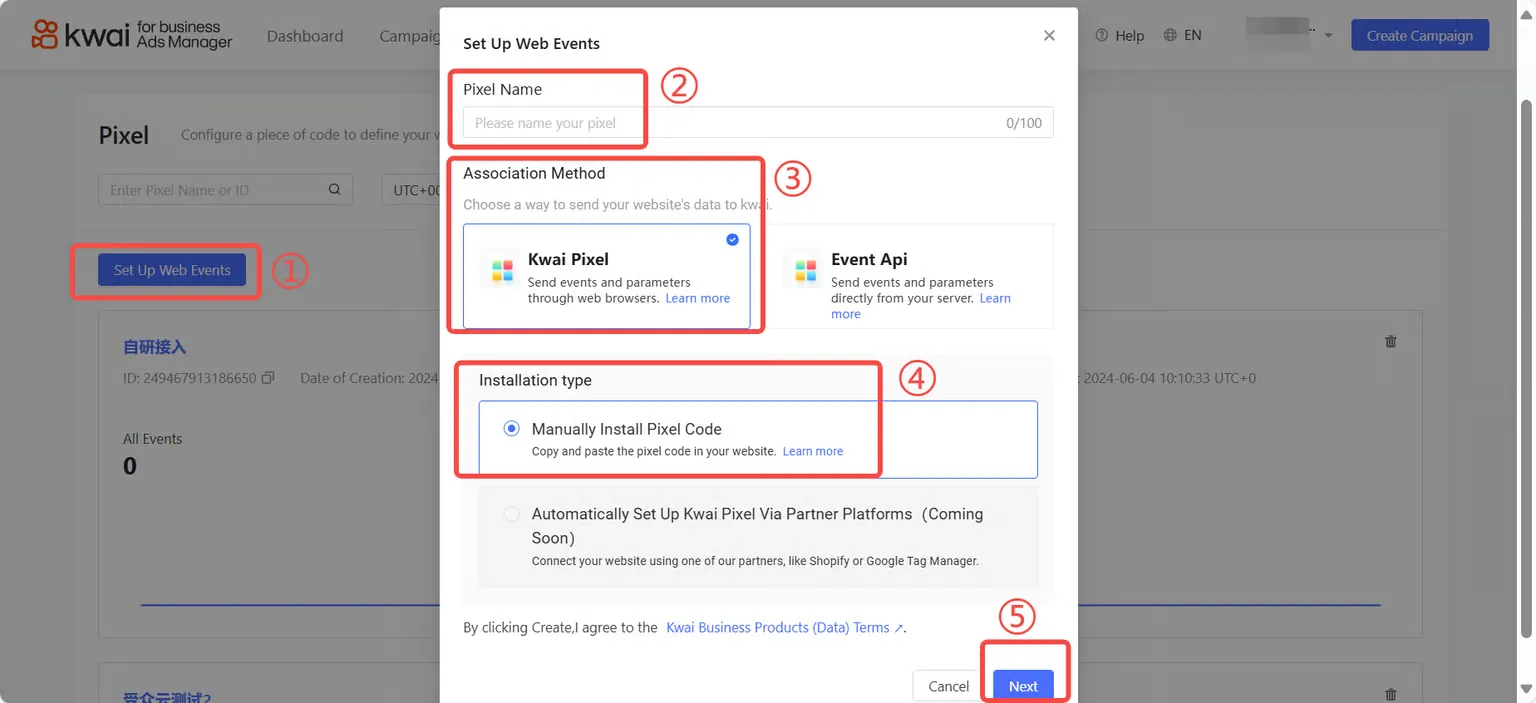
Click [Set up Web Events], complete the Pixel name, select [Kwai Pixel] for the user association method of package network access, select [Manually install Pixel code] for the installation type, and click [Next];
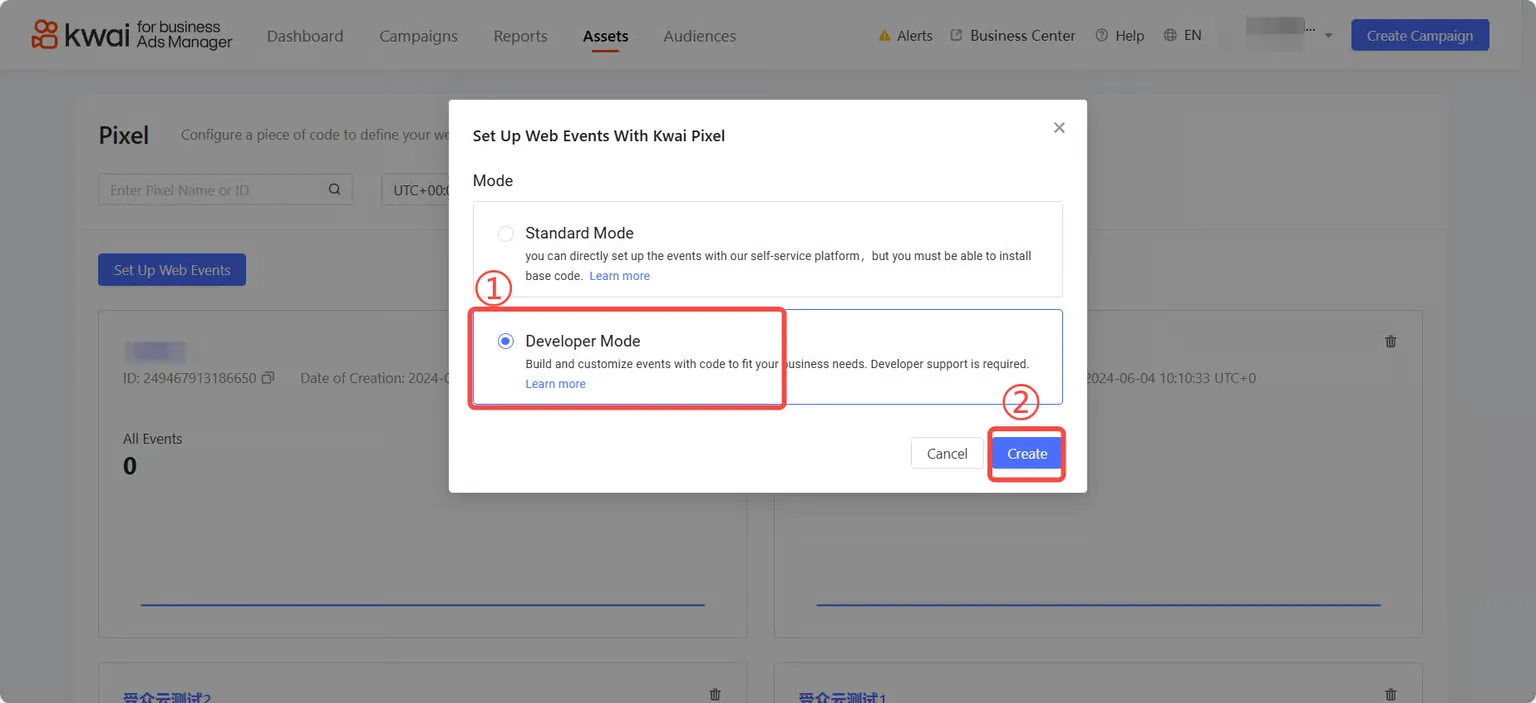
Select [Developer Mode] and click [Create];
click [OK];
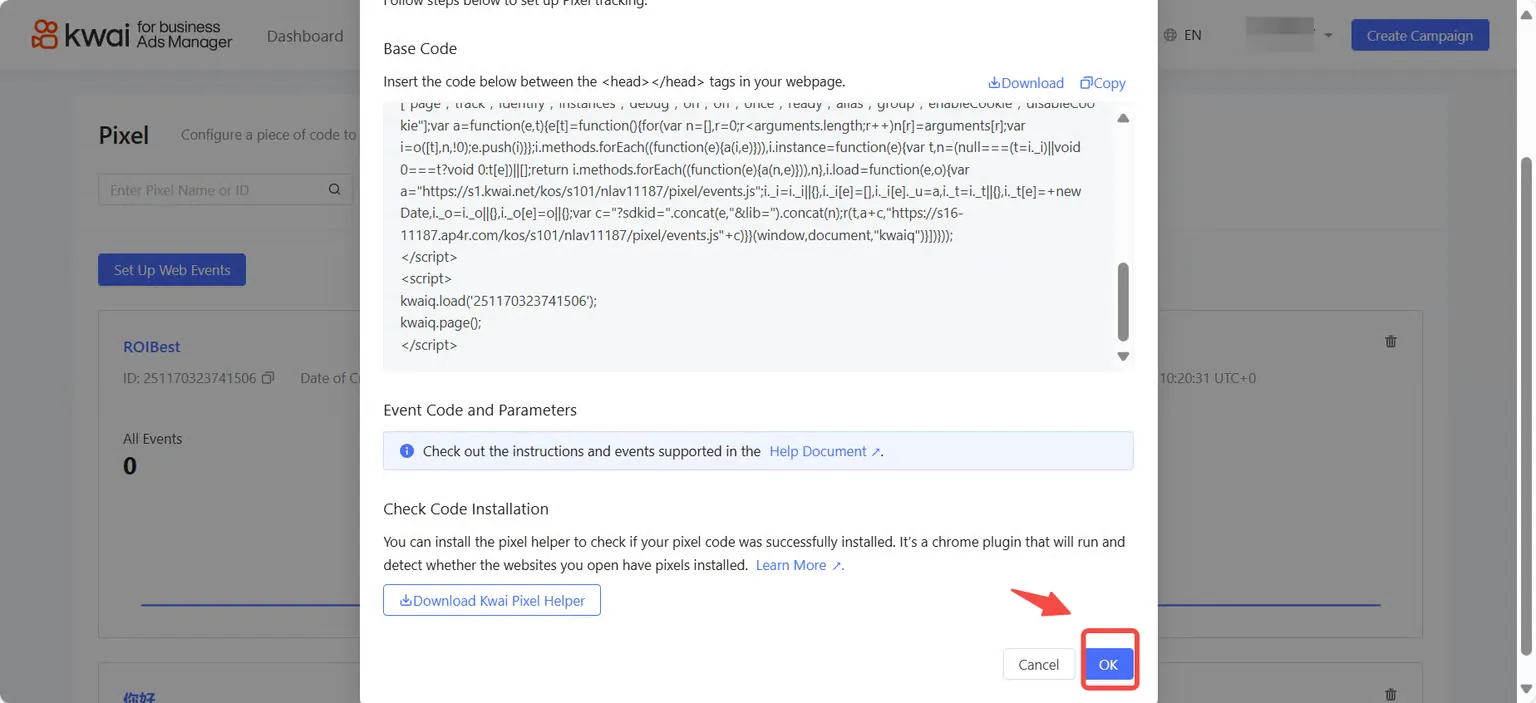
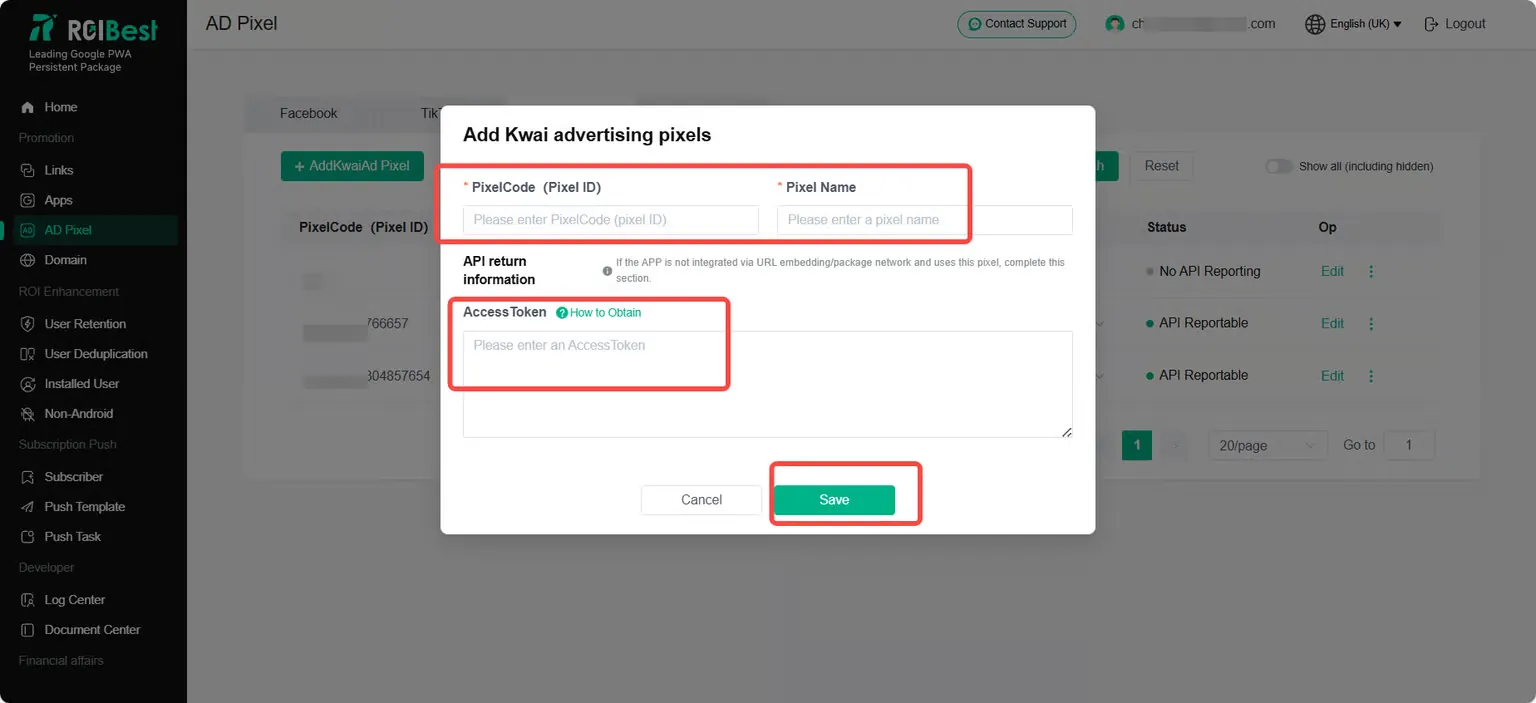
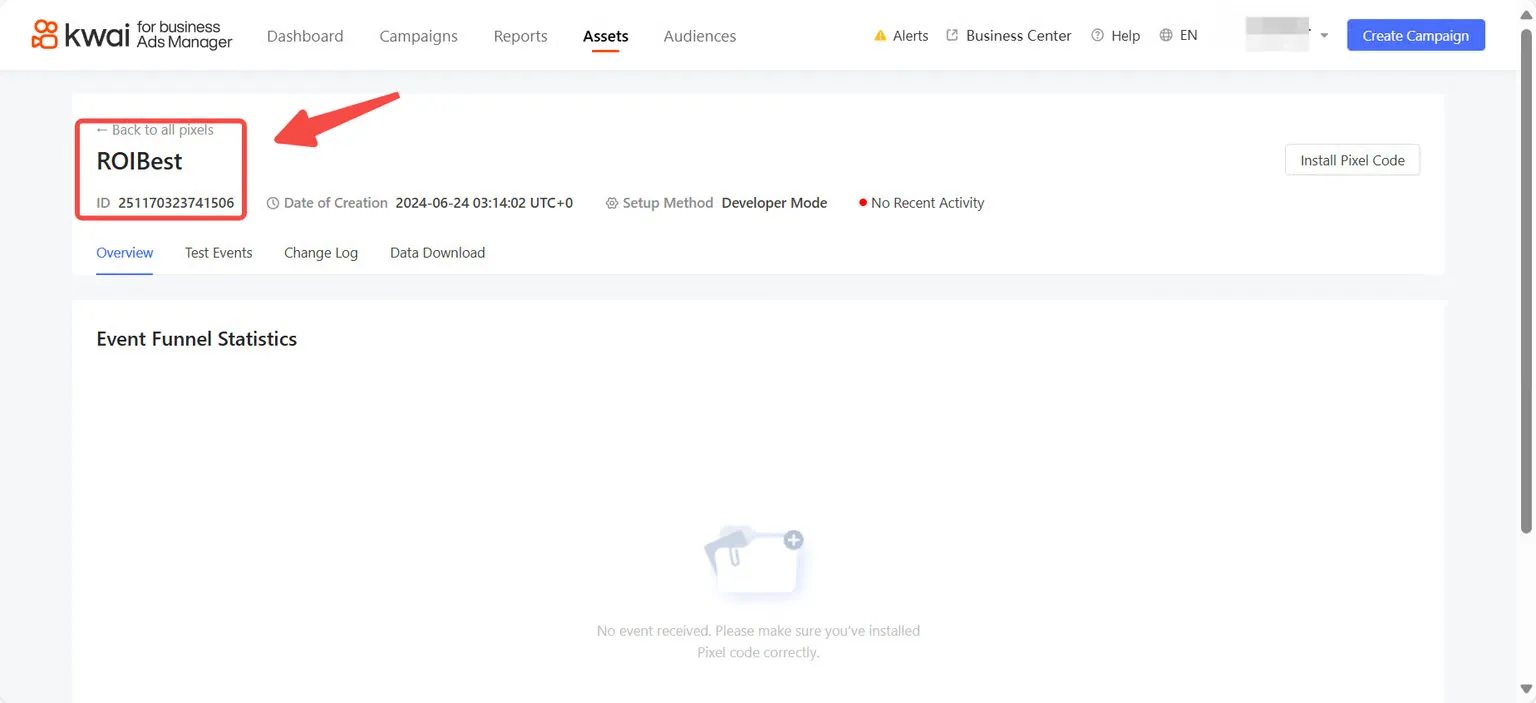
Stay on the [Assets] page, copy the PixelCode ID and fill it into the ROIBest backend;
Step 3 - Kwai test event return method
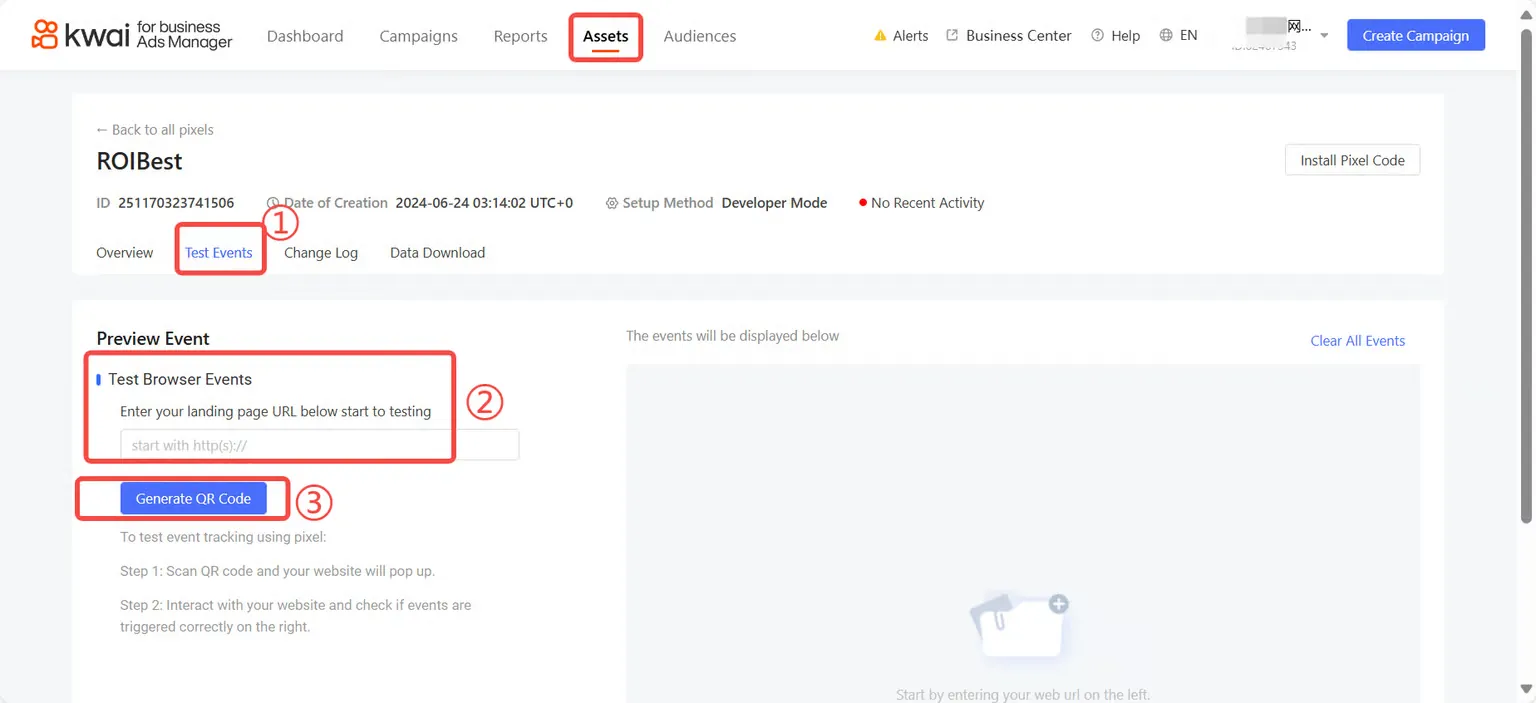
Fill in the package network address in ① and generate a QR code.
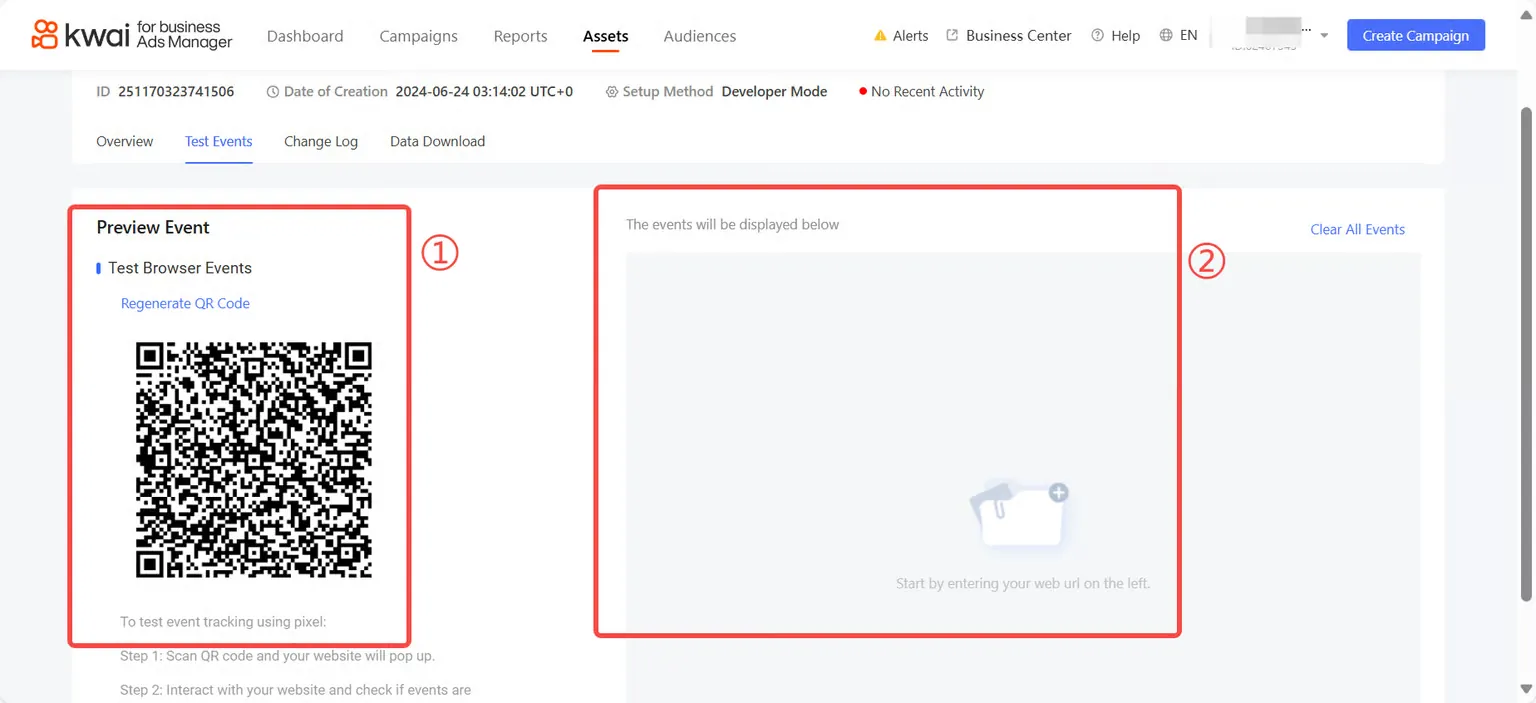
Scan the code with your mobile phone to test. When the test panel generates an event feedback, you can copy the corresponding promotion link for delivery.
(Tip: Due to the compatibility issue of the Kwai test panel, as long as the package network address test generates a feedback, you can copy the corresponding promotion link for advertising delivery)
Self-developed H5 project package (zip):Kwai How to get PixelCode/test feedback?
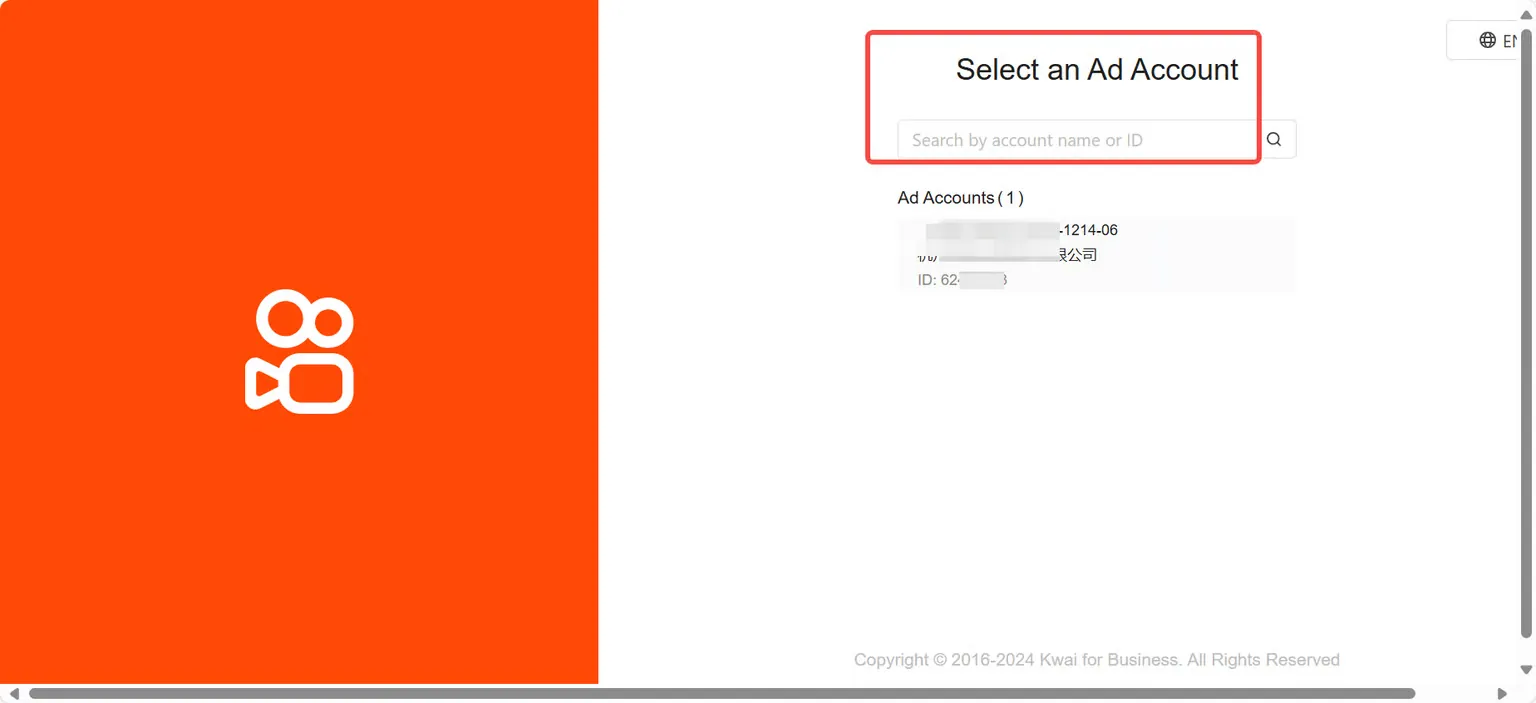
Step 1 - Log in to Kwai Ads
Kwai backend login URL: https://ads.kwai.com/#/ , please log in with your business promotion account;
Step 2 - Create and obtain PixelCode
Select [Assets], click [Web Events] in the drop-down box
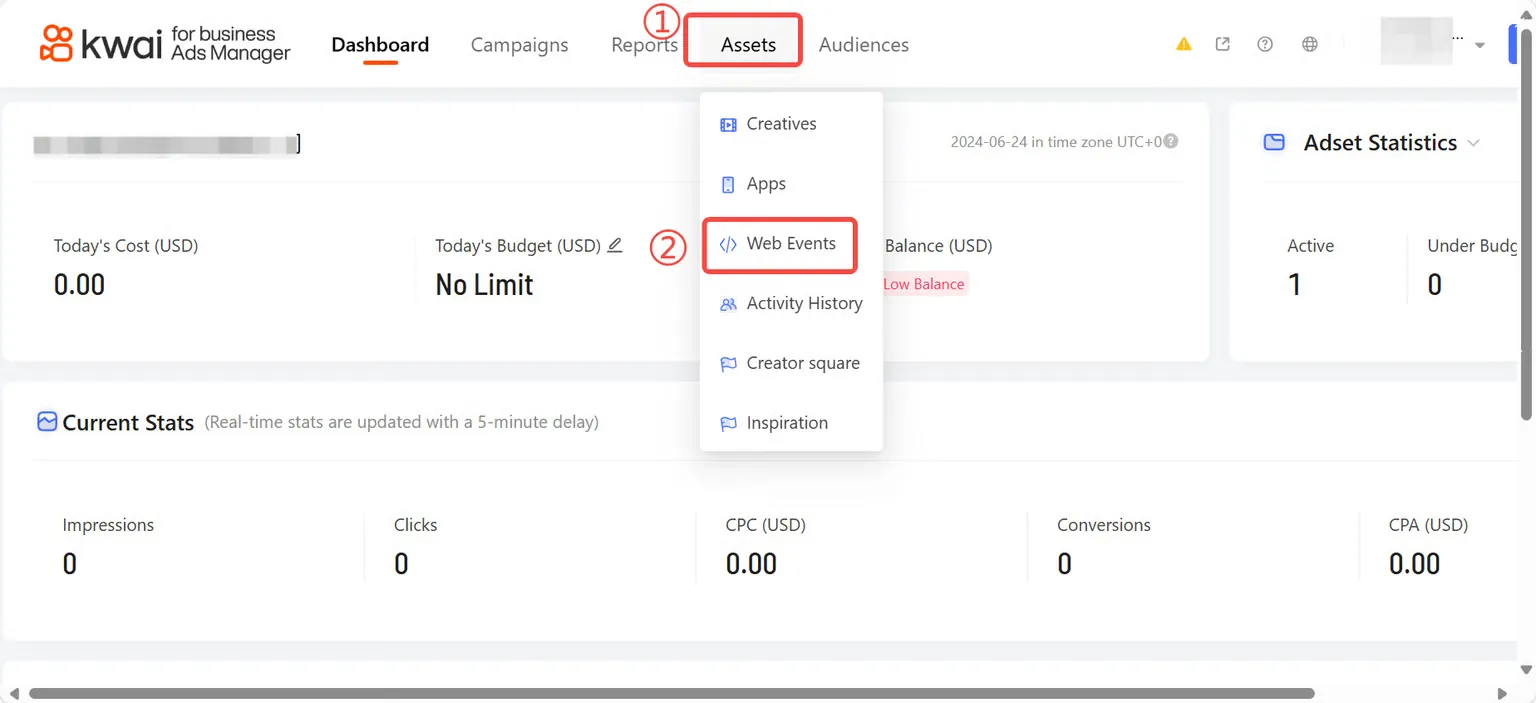
Click [Set up Web Events], complete the Pixel name, select [Event API] for self-developed access user association method, select [Manually Set Events API] for installation type, and click [Next];
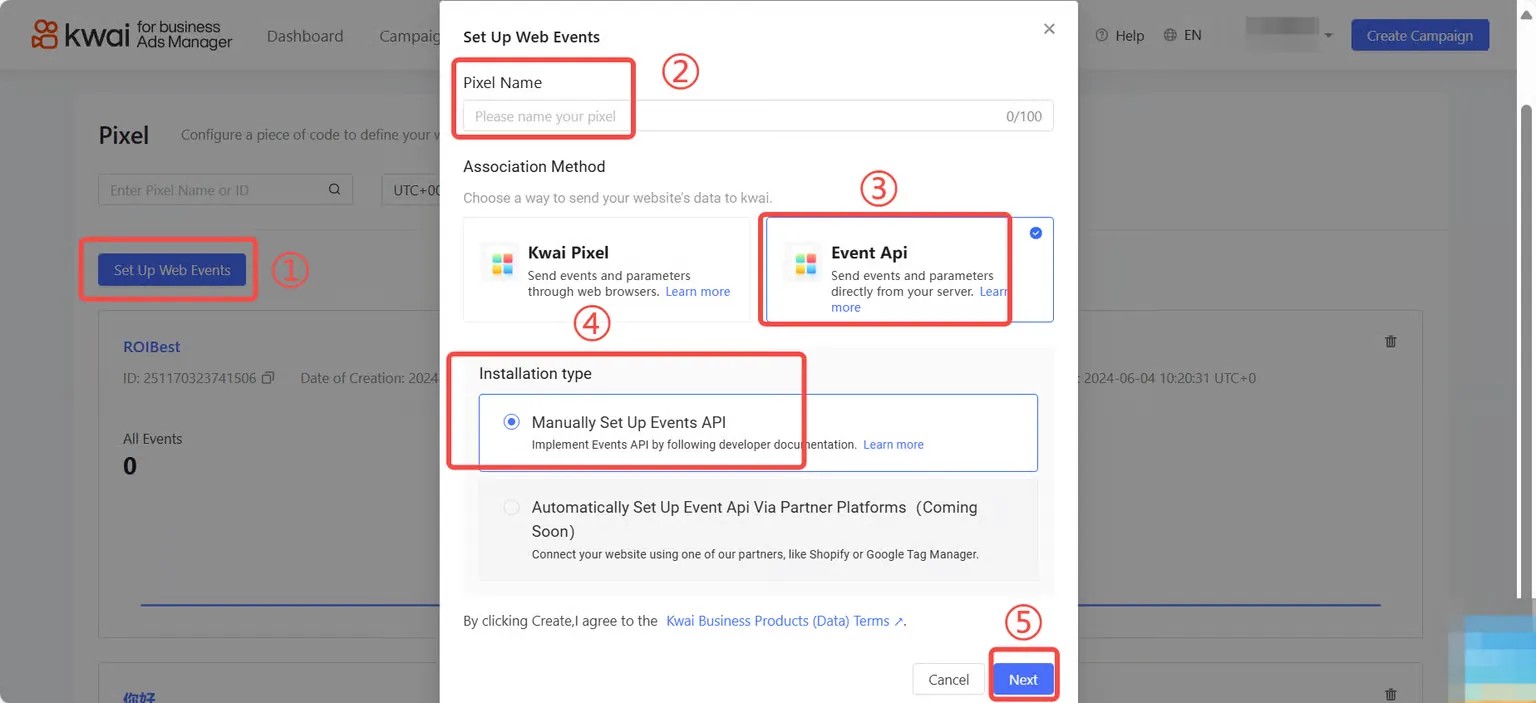
click [OK];
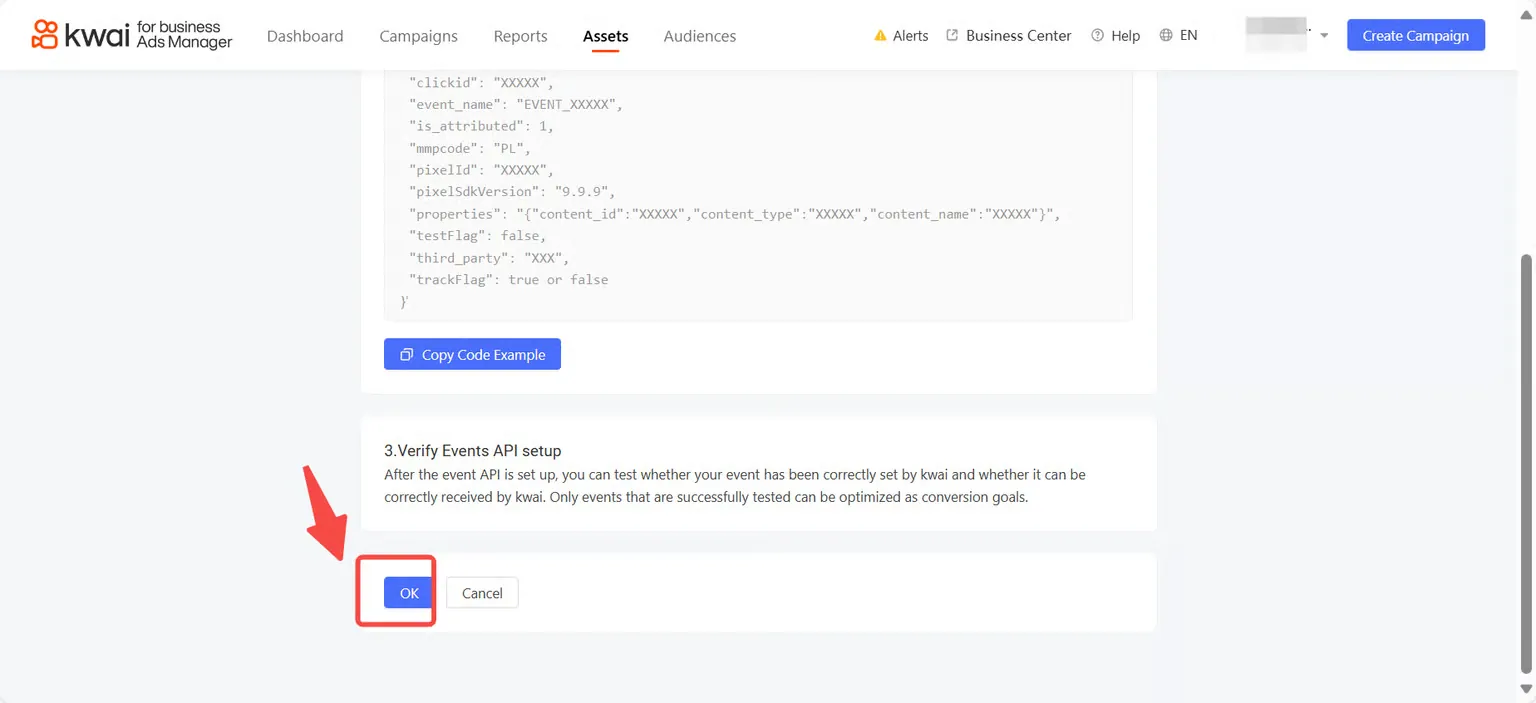
Copy Pixel and fill it into the ROIBest backend;
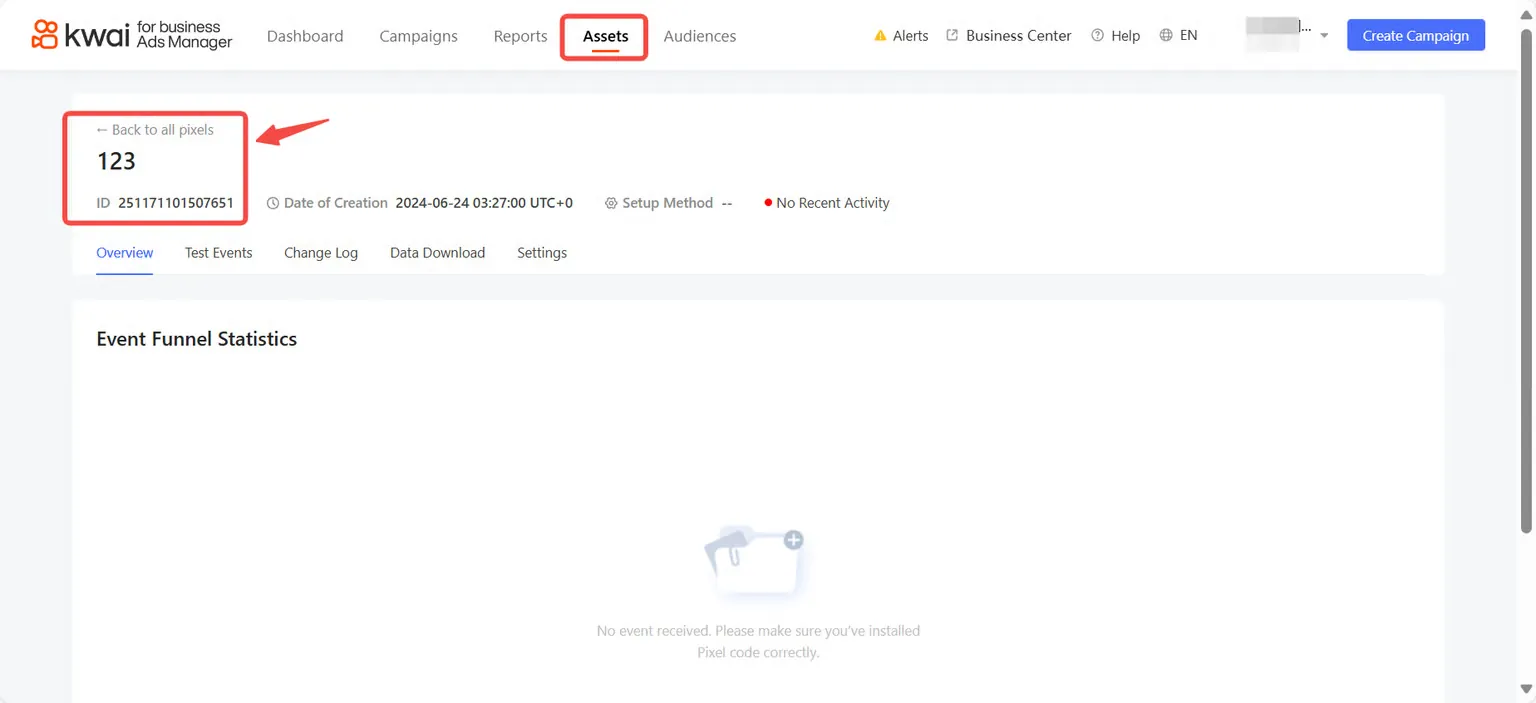
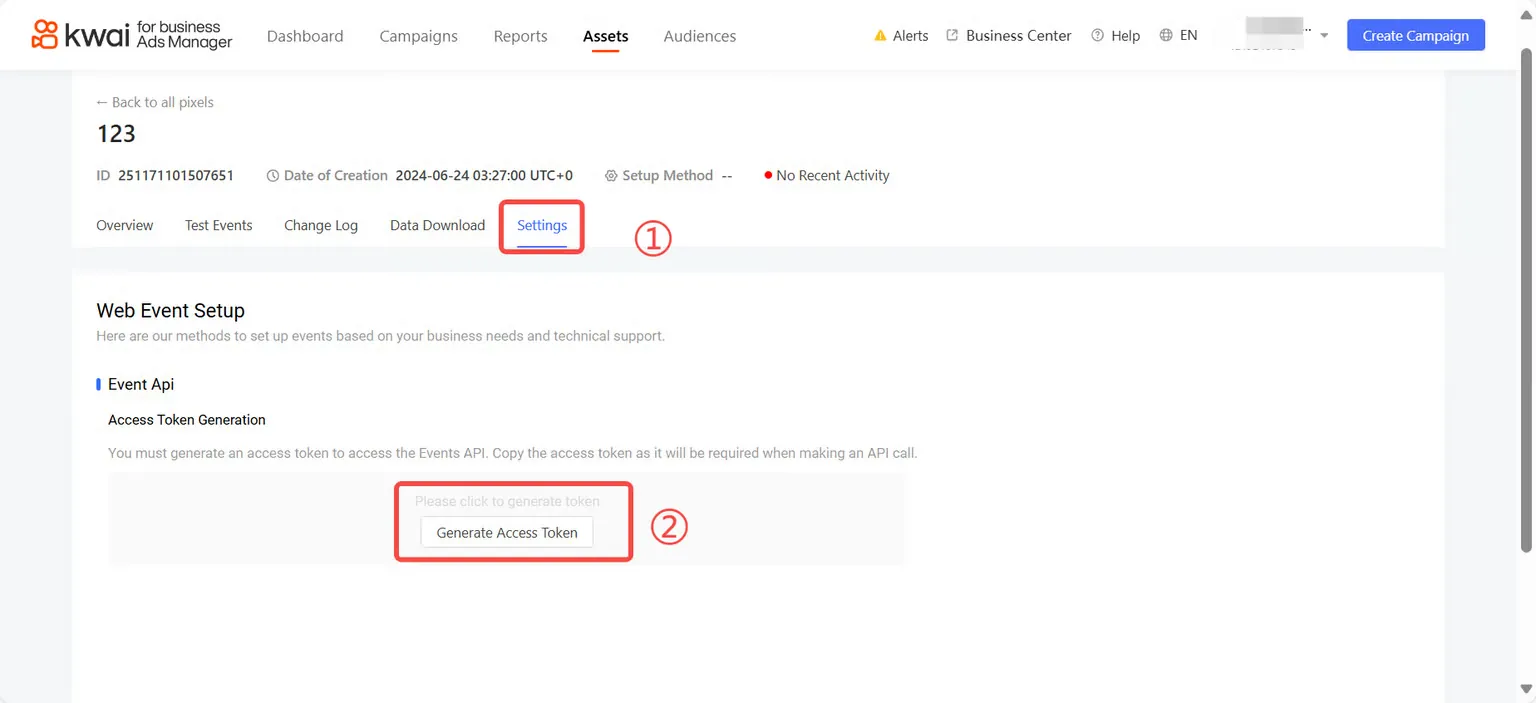
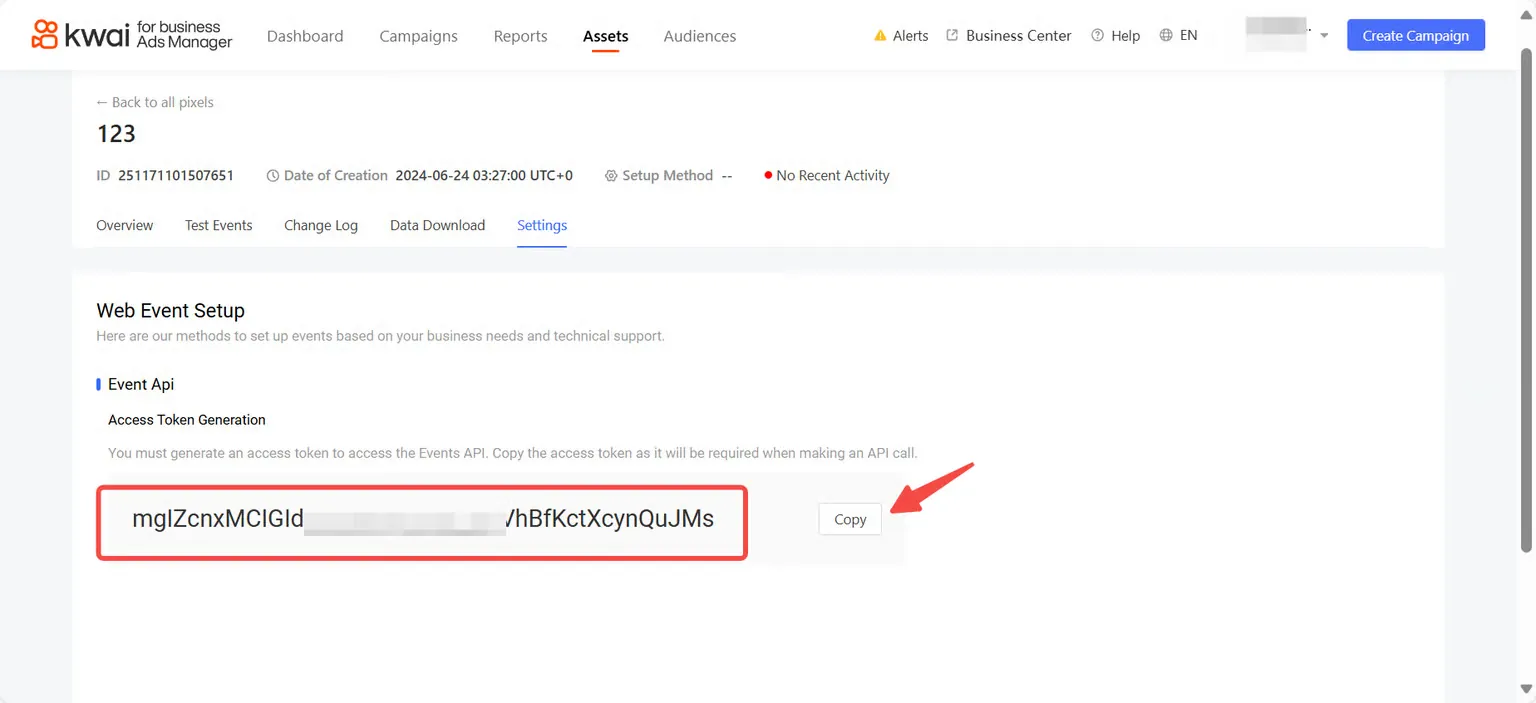
stay on the [Settings] page, click [Generate Access Token], copy the Access Token and fill it into the ROIBest backend;